There are a number of reasons why you might want to trick a web server into thinking you're on a different operating system (OS) or web browser. One might be that you want to test the mobile version of your website from your computer. Or perhaps for some reason a website is restricted to a certain OS or browser and you wish to circumnavigate that barrier. Today's guide shows you how to do just that!
How Do Web Servers Know What Your OS and Browser Are?
Whenever you enter a URL into the address bar of your web browser an HTTP request is sent to the specified domain name.
This request is essentially a specially formatted string of characters that describe your operating system, OS version, etc. When the web server receives your request, it uses this information to send back a specialized version of the website (typically in HTML), specific to your web browser and OS. Your web browser then interprets what the web server sends back and displays it to you.
Want to see what websites automatically know about you when you send an HTTP request? Check out the "What a Website Knows" tool over on UltraTools.
Install a Firefox Add-On
If you don't have Firefox, you can get a free download of it from Mozilla. The add-on that you will need is "Modify Headers", which can be freely downloaded here. This will help us easily modify the HTTP request the browser sends to the web server.
Each request is split into various headers; if you wish to learn about the different types, check out W3 or Wikipedia.
Find the Header You Want
The header we want to modify is the "user-agent". You can find the "user-agent" header for any browser and OS here.
I want to trick the web server into thinking I am using Chrome on Mac OS X 10.7, so I will copy the following to my clipboard (by using "ctrl+c" shortcut):
- "Mozilla/5.0 (Macintosh; Intel Mac OS X 10 7 4) AppleWebKit/537.13 (KHTML, like Gecko) Chrome/24.0.1290.1 Safari/537.13"
Note that directly copying this may not work since underscores are processed as italics on this site.
Modify the Header Using the Add-On
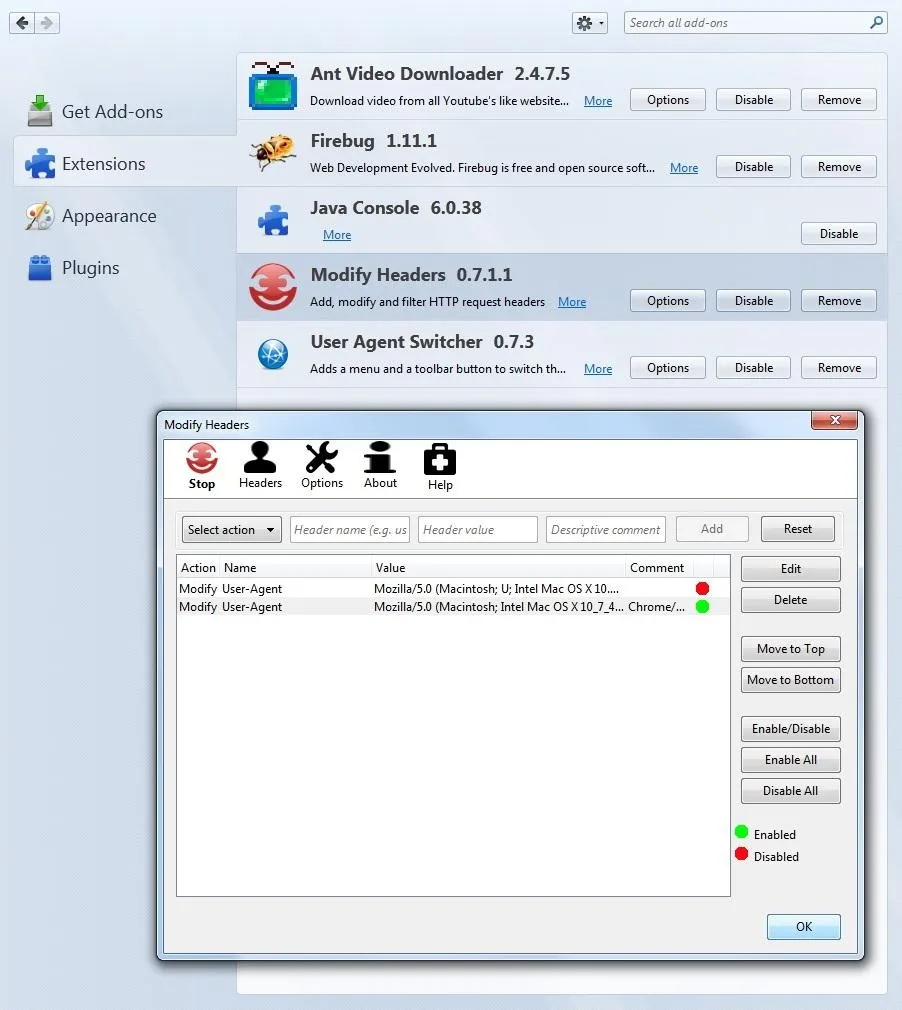
To get to the add-on, click on the "Firefox" menu located in the top left-hand corner. Next, click "Add-ons" (identified by the puzzle piece icon). Make sure you are in the "Extensions" tab and then find "Modify Headers" and click "Options".
The next step is to toggle the "Select action" pull-down menu and select "modify". Type "User-Agent" into the header name and the string we copied from above into the "Header value" box. Add a comment to identify it (if you want to) and then click "Add". Make sure that there is a green dot next to it and that the add-on is activated by clicking "Start" (smiley face icon in top left corner of window).
Your screen should now look something like this:

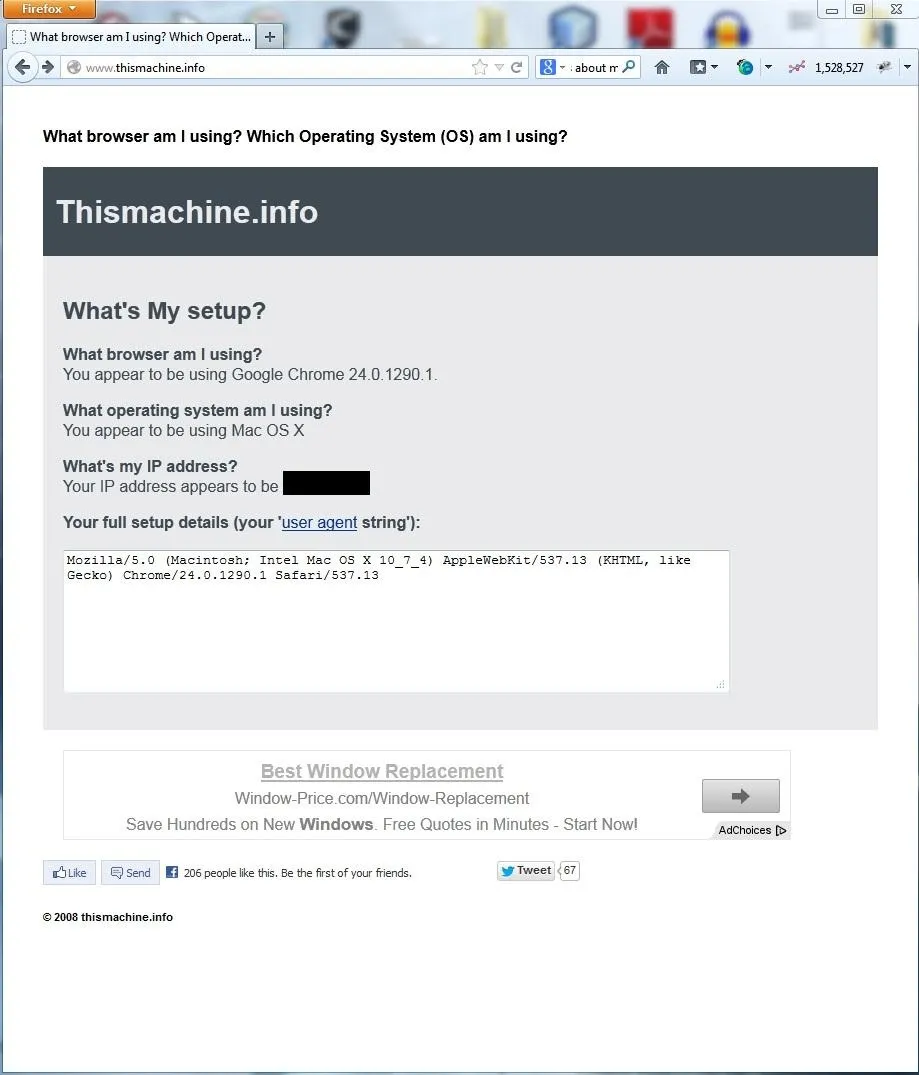
Now let's check if it works by visiting Thismachine.info. Now it says I am using Chrome and Mac OS X, success!

Have questions or comments? Ask in the forum or in the comments section below!
Also, check us out on Facebook and Google+.
Was this article interesting and informative? Then be sure to support the author by giving it Kudos!
Cover image from Lifehacker


Comments
Be the first, drop a comment!